Installing a new floor, whether hardwood, laminate, vinyl, or tile, requires a few requirements. The subfloor must be flat and free of humps and troughs, one of the essential requirements.
Concrete slabs and Plywood subfloors are rarely flat, even in newer homes. High and low places can detract from the appearance of a finished floor, cause installation issues, and even contribute to material failure, particularly in tile floors.
How to Level Different Floor Types?
Over a 10-foot span, most flooring manufacturers recommend a fluctuation of no more than 3/16 inches. Although some subfloors with rot, insect infestation, or structural difficulties may require expert attention, floor levelling is a straightforward DIY project.
Identifying High and Low Points
Before levelling a subfloor, locate the high and low locations. You'll need a straightedge and a measuring tape for this.
You can use a long straightedge, such as a long spirit level or a straight board on its edge. Swing the straightedge across the floor from one reference point to the other, marking the high and low regions with a pencil. Continue walking around the room until you've covered every inch of it.
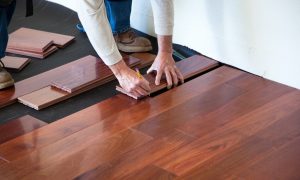
A Step-by-Step Guide to Leveling a Wooden Subfloor
- Check for loose nails and seams on a plywood or wood subfloor, and remove any nails, screws, or staples that protrude above the surface.
- Replace loose nails or tighten seams by driving screws through the subfloor into the floor joists. To reduce airborne dust, connect the vacuum to the sander if possible.
- Remove any high locations you've indicated with the sander, checking with the straightedge. Sweep and vacuum the entire floor once you've sanded down the high points.
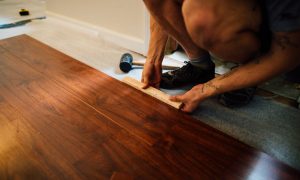
- If the difference between the high and low spots isn't too significant, you can improve the flatness by laying a new piece of plywood over the entire previous flooring. This technique isn't generally applicable because it raises the finished floor level and may make transitions to other rooms more difficult.
Levelling a Concrete Floor: A Step-by-Step Guide
- Tape plastic sheeting over doorways and windows before you begin to prevent concrete dust from entering the rest of the house. Make sure your respirator is securely fastened.
- If you're using a small angle grinder, have a friend hold the vacuum nozzle close to the grinder while you work to capture dust. Even though floor grinders come with dust bags, they produce a significant amount of airborne dust.
- Sweep the grinder back and forth, concentrating on each high point and monitoring your work with a straightedge at regular intervals.
- Vacuum and/or sweep the slab to eliminate any remaining particles when you're done.
How to Fill in the Gaps on the Floor?
How you fill the low spots depends partly on the sort of completed flooring you'll be putting in. Stapling layers of builder's felt (tarpaper) into low regions on a wood subfloor can sometimes support floating floor systems like laminate or vinyl.
The quantity of pruning and rechecking, on the other hand, might get laborious. A self-levelling underlayment is a speedier solution that works for all types of flooring on both wood and concrete subfloors. It's a cement-based material that may be blended, poured, and troweled into low locations. It's available as a pre-mixed or dry mix.
Some underlayments are universal, while others are material-specific, so study the fine print before purchasing. Most self-levelling systems also require a latex primer to improve the adhesive between the floor and the subfloor.
- Using a paint roller, apply a coat of primer to the subfloor. Allow the primer to dry completely. If you're using a dry mix, follow the manufacturer's instructions for mixing it with water. It should have the consistency of pancake batter—not too firm and not too soupy.
- Scoop the underlayment into the low spots and spread it out with the wide trowel until it's level with the rest of the room.
- After the underlayment has dried, check the filled areas with your straightedge; you may need a sander to feather the edges or high spots.
How to Level a Tiled Floor?
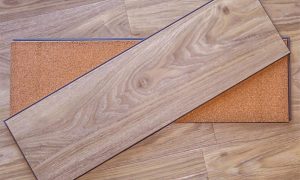
If you want to lay tile over plywood flooring, you'll need to go one step further after smoothing the plywood. A stable, bondable substrate can be created by layering a 14-inch cementitious backer board on the plywood.
- Mix the thin-set according to the instructions after flattening and cleaning the plywood. Spread it out over an area the size of one sheet of the backer board with the notched trowel.
- Screw the backer board into the plywood after placing it on the thinset.
- Allow 1/4 inches between the board and the walls and 1/8 inch between the panels. When you need to cut a part of the panel, mark the cut, score the mark on both sides of the panel with the backer board knife, and snap the amount.
- You can also use a circular saw with a masonry blade, but make sure you cut outside because it produces a lot of dust.


 0405 900 741


 Call Now